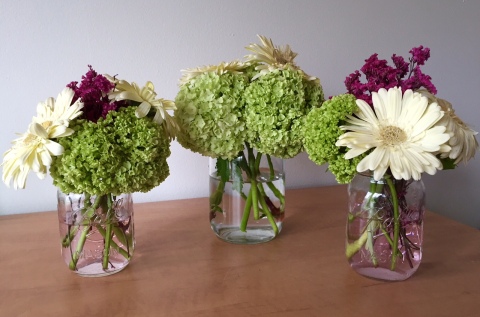
Get in the swing of spring!
Nothing brightens my day more than fresh flowers. As spring sets in and flowers are blooming, here are my simple instructions for making your arrangements beautiful. I find flower arranging to be meditative and stress relieving, so my number one piece of advice is not to worry! Flower arranging should be fun and any mistake can be quickly fixed—that’s the best part!
Before you begin, think about what kind of look you are going for with your arrangement. Is it for a dinner party or just everyday decoration? Do you want it to be fancy and precise or a little more wild and loose? I tend to like flower arrangements that are less refined, so I usually opt for a mixture of flower varieties and do not use flower frogs or rubber bands. My favorite arrangements are ones that look natural—like they just came out of the garden. I like them to be colorful and have lots of texture so that every angle of the arrangement has some interest. Also, think about the vase you are going to use. My favorite vases are canning jars, which look amazing and are super cheap!
After you have chosen your flowers and vases, the first thing to do is trim them. When I’m working with just one flower variety, I usually leave on more of the leaves and greens to keep some interest in the arrangement. However, if I am working with a few different flower varieties I will remove most, if not all, of the greens.
Once I have trimmed my flowers, I like to lay them out on a flat surface by type so I know how much of each variety I have. Then I start by arranging the flowers in my hand one by one. This allows me to get an idea of what the arrangement is going to look like as I go and I can fill in any holes as they arise. Once I think I have enough to fill my vase, I cut the blooms to size. Always make sure to cut the flowers longer than you think they will need to be—you can always cut them again but you will not be able to make them longer!
Next, I put the flowers in the vase and trim individual blooms to get the look I want. My best tip for creating your arrangement is try to make it so that each flower’s best feature is highlighted and each bloom gets some of the spotlight. I try to vary the heights of the flowers with the outer blooms shorter than the ones in the middle of the vase so that each flower can be seen. While I do try to have a front side of the vase in mind, I like to make sure the arrangement looks good from all sides.
The final step is to enjoy your beautiful creation!
-Emilie Nadler
Photo Credit: Emilie Nadler
Photo Copyright (c) 2015 Emilie Nadler. All rights reserved.
Photos are not to be used without prior permission & license.


1 Response